Building an image retrieval app with Supabase
5 min read ·
In this article, I will show you how to build a generic foundation for an image retrieval app that can later be fine-tuned to a specific use case.
I will guide you through creating a Python backend with machine learning logic.
We will be using the Supabase vecs Python library and
Supabase Storage. Afterward, we will integrate
it into a frontend application.
I’ll be using the following tech stack:
- Python: all the image retrieval logic will be implemented on the backend.
- FastAPI: a Python web framework for building APIs. We’ll use it to create a minimal REST server that we’ll later integrate with to perform the search.
- Supabase’s
vecs: a Python client for managing and querying vector stores. We’ll use it to query similar images. - Supabase Storage: used to store and retrieve images.
- Hugging Face’s Model hub: think of it as an NPM but for pre-trained models. We’ll obtain the model from there.
- timm: a deep-learning library for image classification.
Let’s get started!
🔗 If you want to dive straight into the code, here’s the repository.
Setting Up Supabase
- Start by navigating to the Supabase Dashboard and click on the “New Project” button to create a new project.
- Once you have successfully created the project, proceed to set up new storage. We’ll use it to store images. Don’t forget to upload a few!

Building the Python Backend
Prerequisites
Python 3.9pippoetryfor packaging and dependency management
Install poetry using pip:
sh
sh
Initialize a new project:
sh
sh
Adding Dependecies
We need to add the following dependencies to our project:
- vecs: Supabase Vector Python Client.
- matplotlib: for displaying image results.
- timm: a library for deep learning-based image classification.
- storage3: Python Client library for interacting with Supabase Storage.
- dotenv: for loading environment variables.
sh
sh
Processing Existing Images
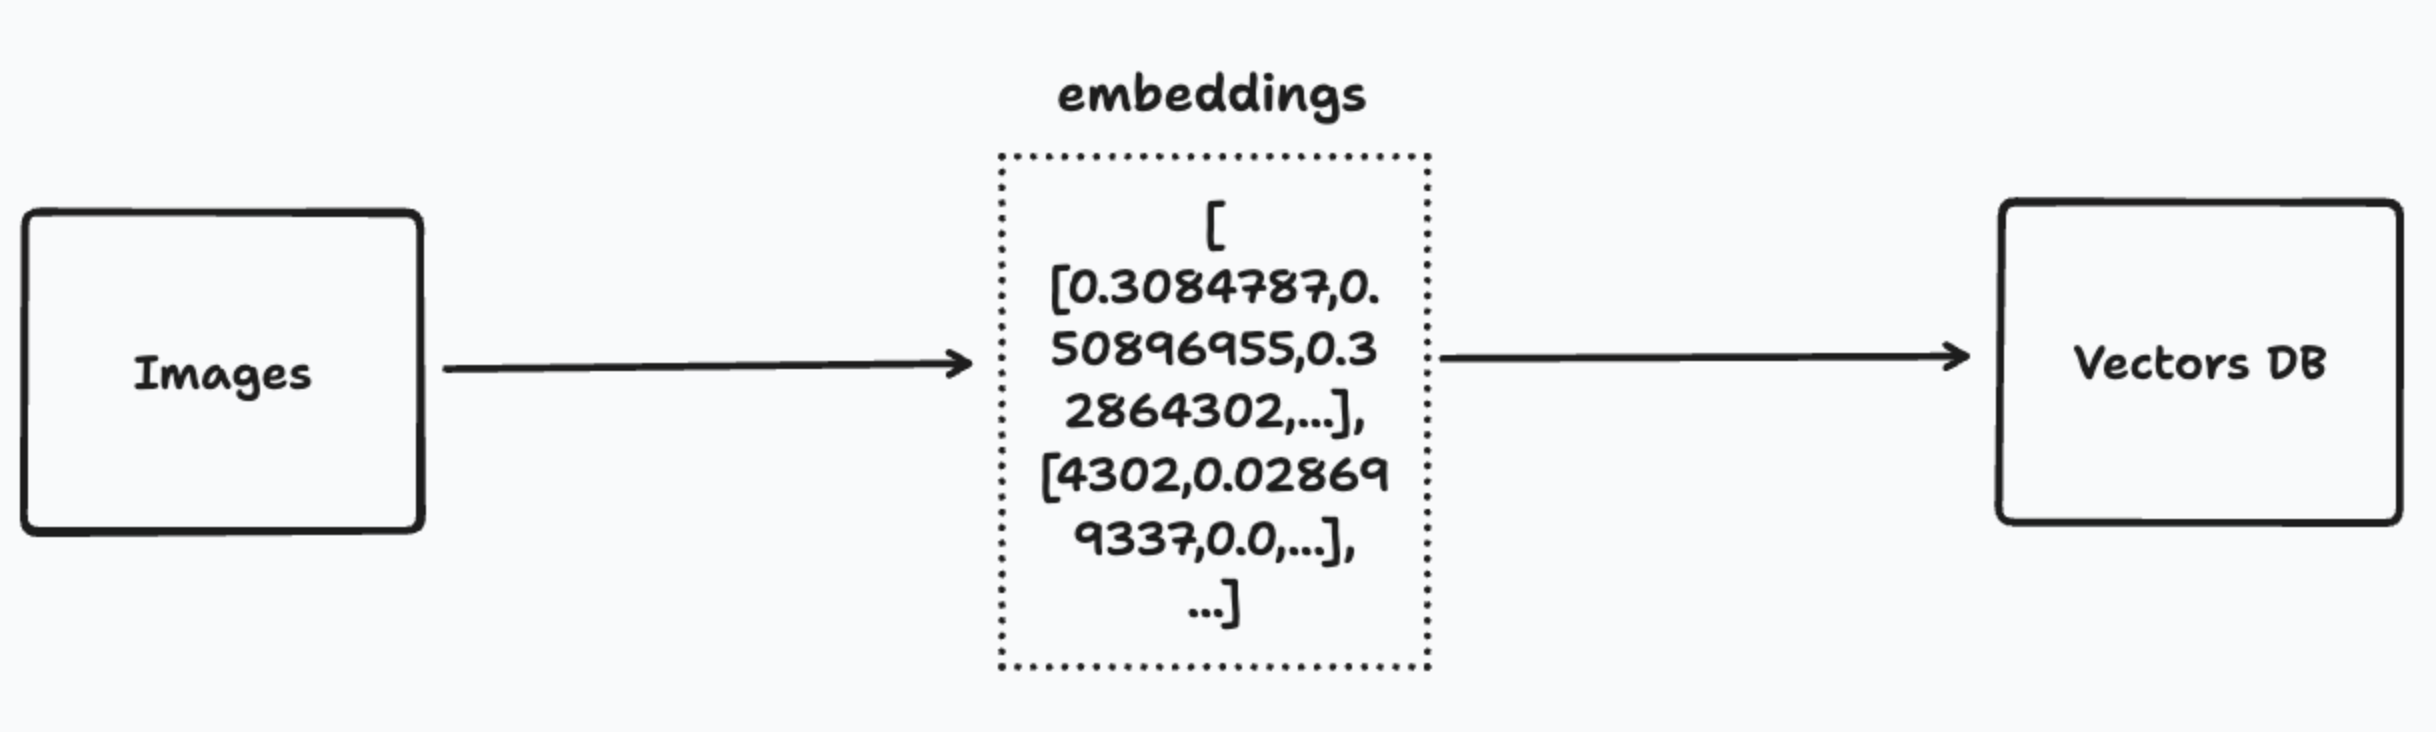
To start, our first task is to generate embeddings for our existing images. Embeddings are arrays of numbers (vectors) that represent data, specifically images in our case.
This step assumes that you’ve already uploaded some images to the Supabase storage.
Let’s walk through the process of configuring the necessary settings, loading a pre-trained model, and defining a seeding function to process and store the image embeddings.
Create a main.py file in the image-retrieval folder. We are going to add a
few things:
- Imports
py
py
- Environmental variables
You can obtain the Supabase keys and database URL from the Supabase dashboard.
py
py
- Storage configuration
This sets up the Supabase storage URL and initializes the storage client with the necessary authentication headers.
py
py
- Vector database setup
This step connects to the vector database and initializes or retrieves a collection for storing image vectors.
py
py
- Model Initialization
It loads a pre-trained Inception ResNet V2 model and sets it to evaluation mode.
py
py
- Seeding function
py
py
Now we have a little bit more going on. The seed function does the following:
- Sets up image transformations.
- Lists all files in the Supabase “images” bucket.
- For each file, fetches the image, processes it through the model, and stores its vector in the database.
- After processing all images, creates an index for faster searches.
Now that this is done, we can add it as a script to pyproject.toml:
toml
toml
And then we can execute it:
sh
sh
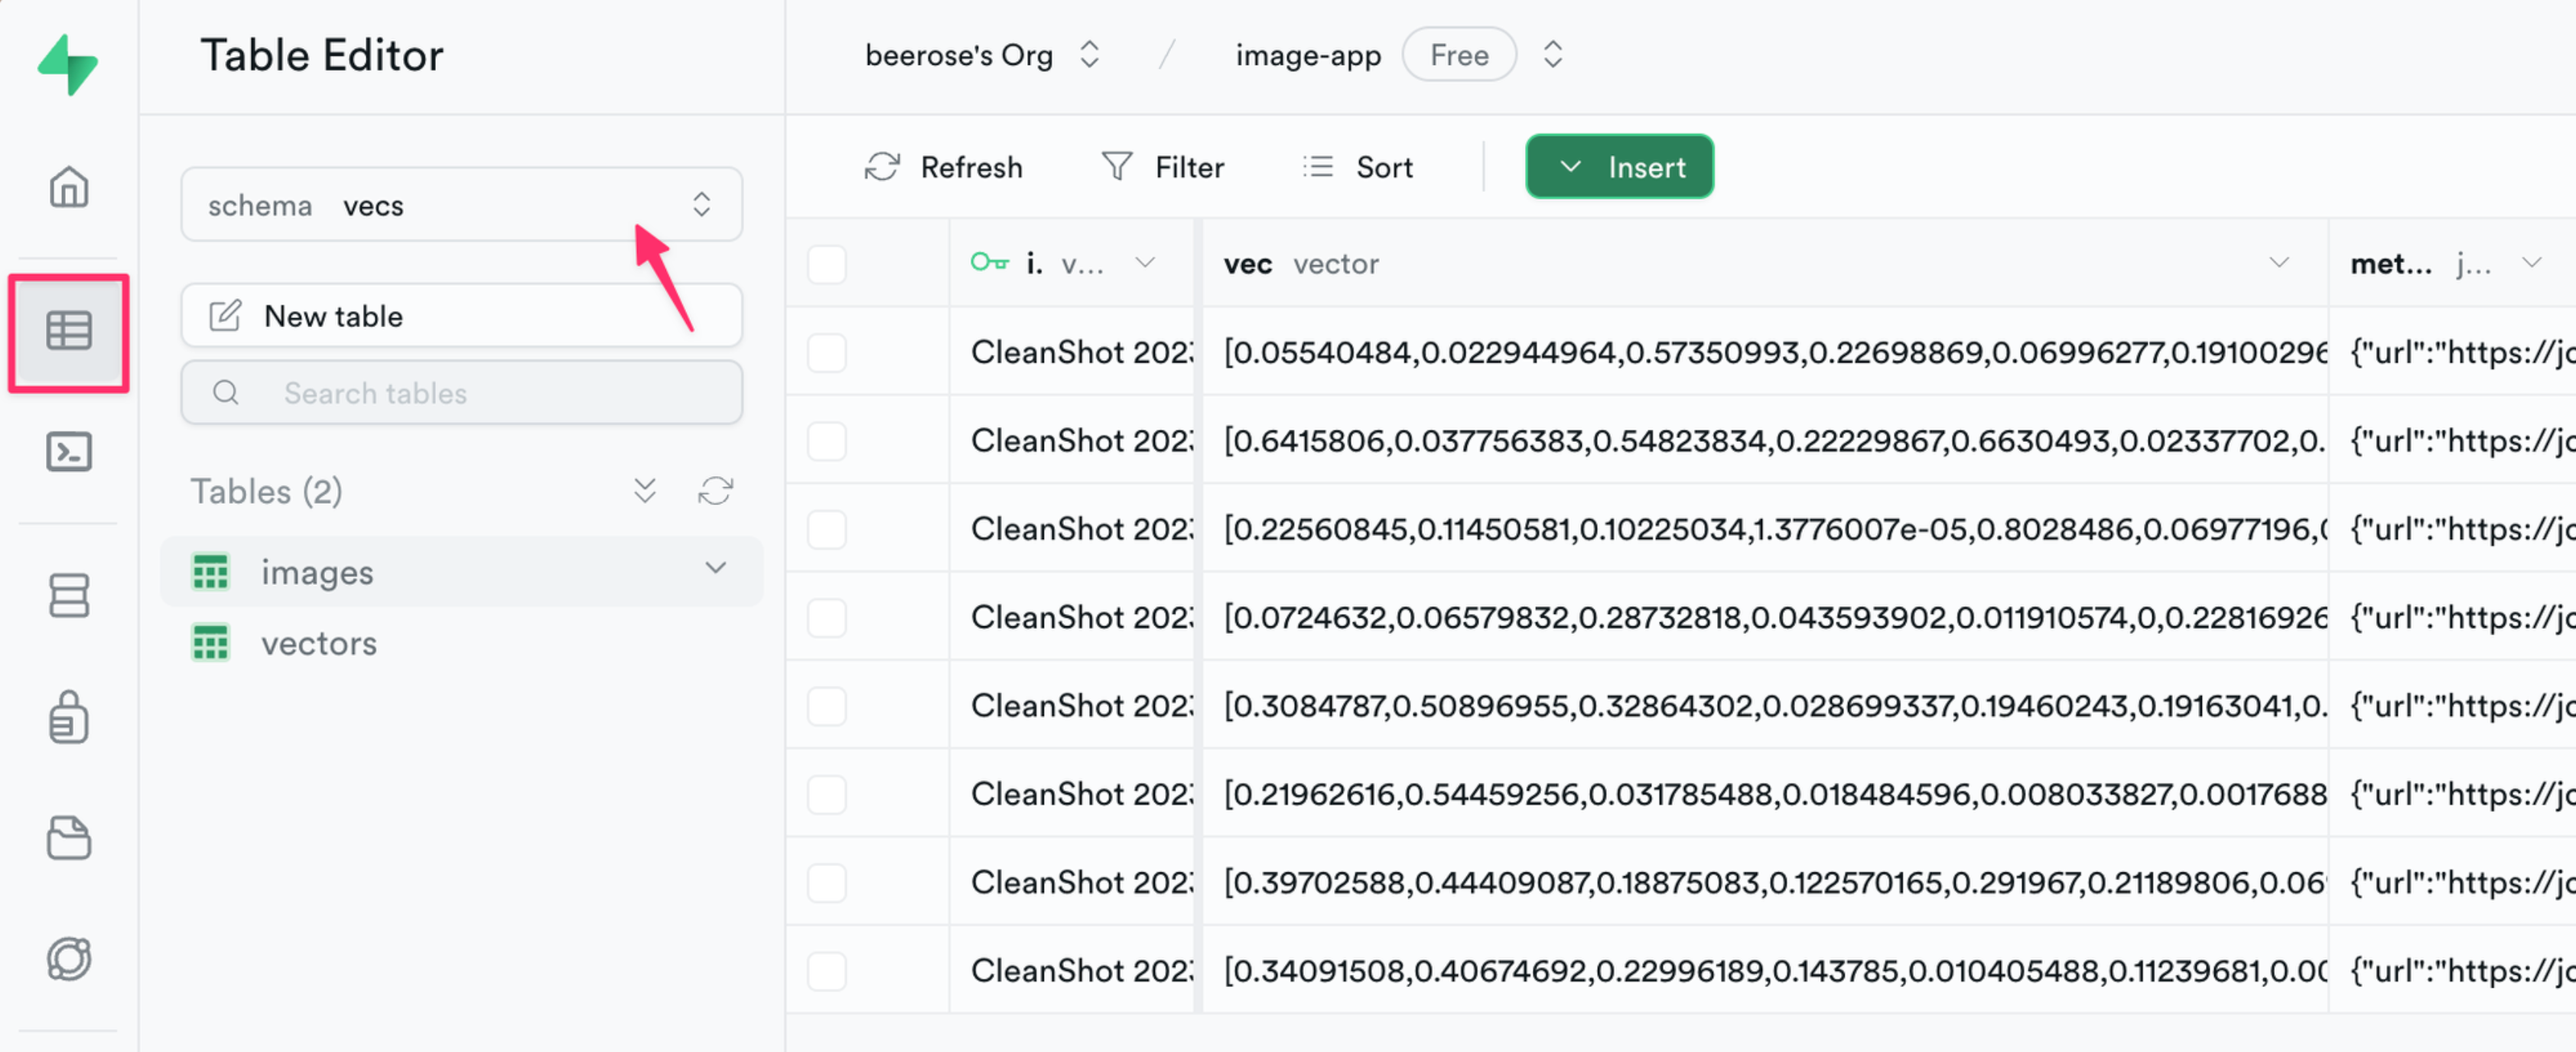
Once the script is complete, you can navigate to your Supabase dashboard to view the newly created entries.
Searching Images by Image
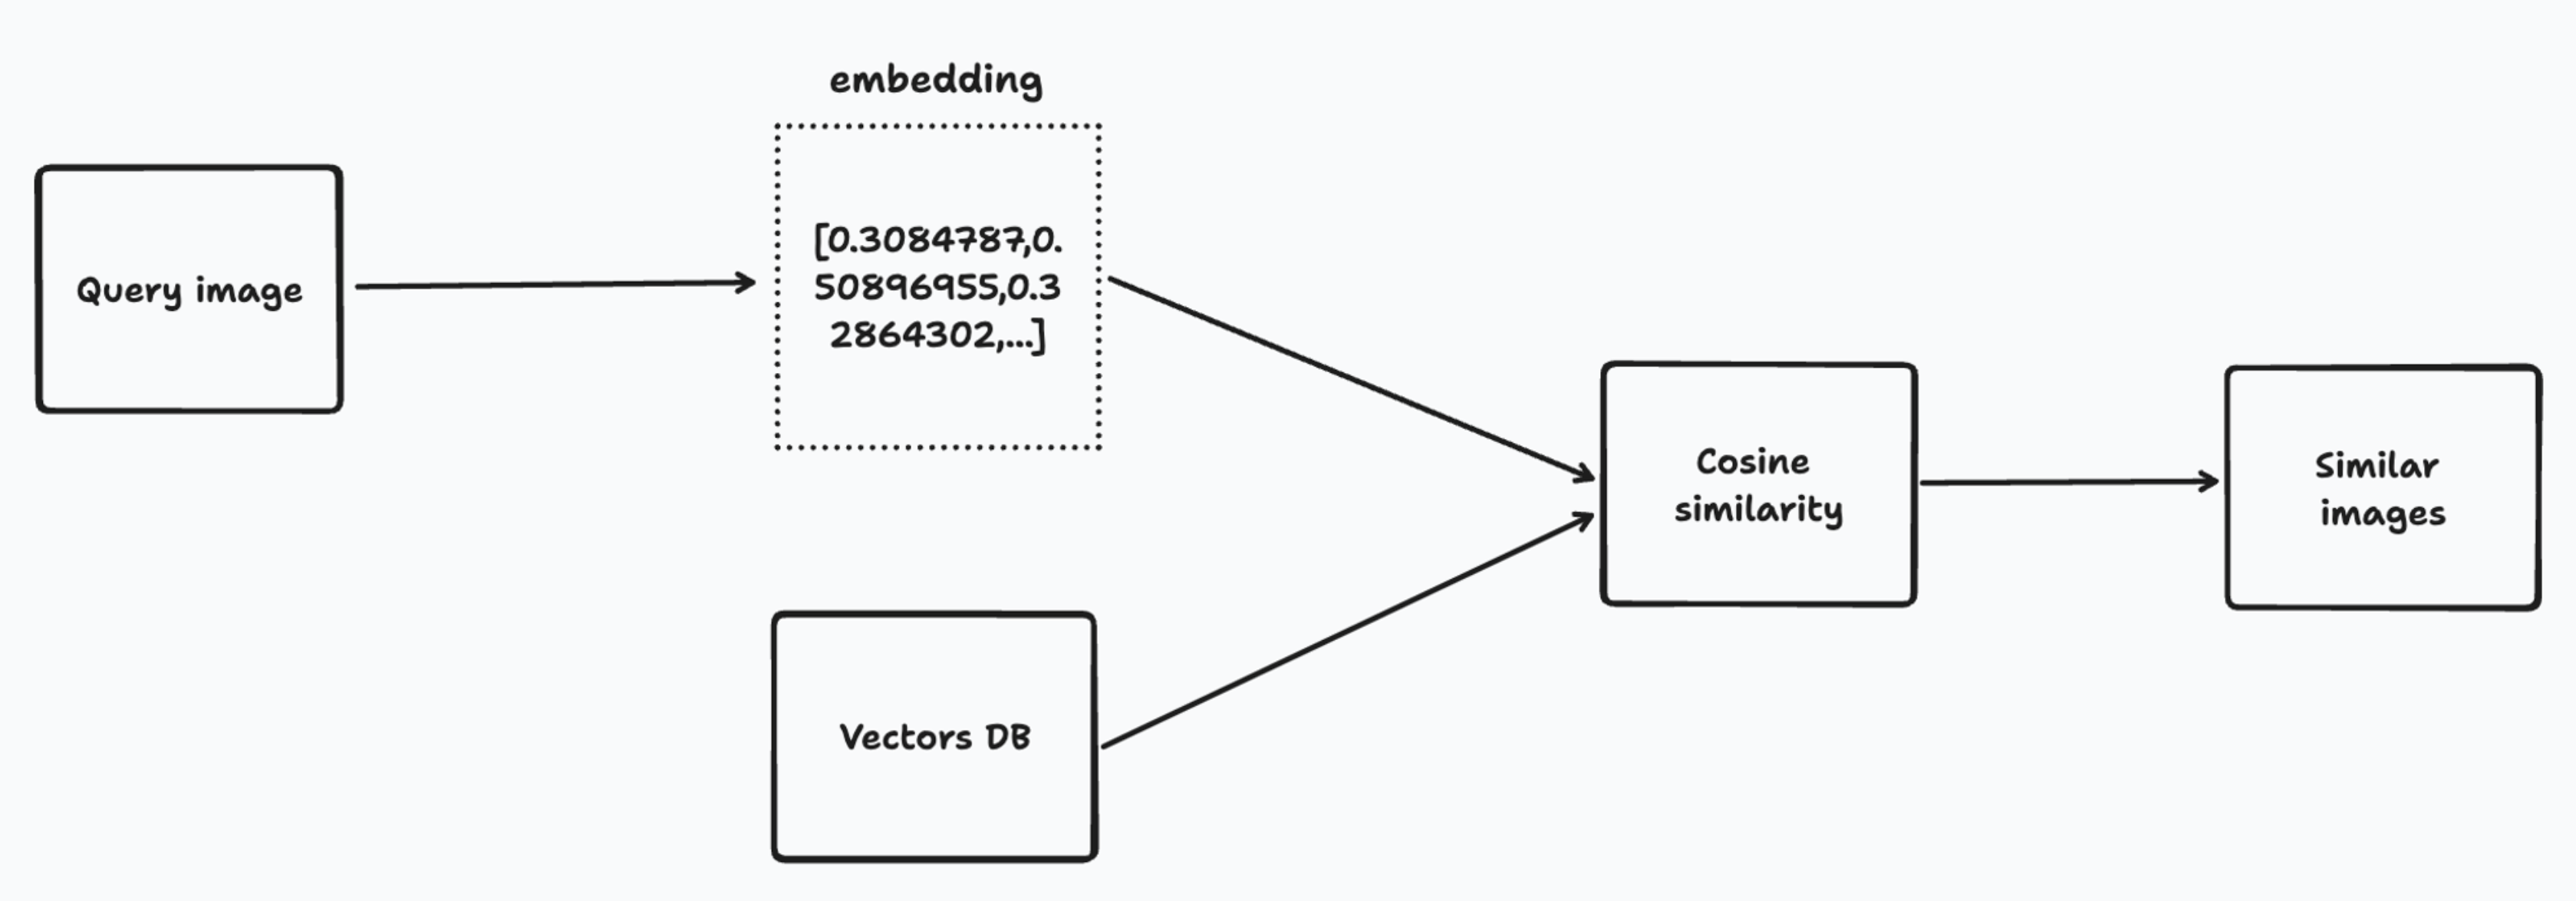
With Supabase’s vecs library, querying our embeddings becomes straightforward.
We’ll use an image as our search input and retrieve similar images from our
database. The provided code guides you through this process, from setting up the
necessary configurations to defining a function that returns similar images.
To visualize the results, we’ll use matplotlib.
We will add a new method in the main.py file.
py
py
Here’s what the function does:
- Setting up image transformations.
is_training=Falseindicates that these transformations are for inference mode, not training. - The input image is converted to RGB format and then transformed. Then, it is passed through the model to obtain its embedding.
- The
images.querymethod searches the database for images with similar embeddings to the input image’s embedding.
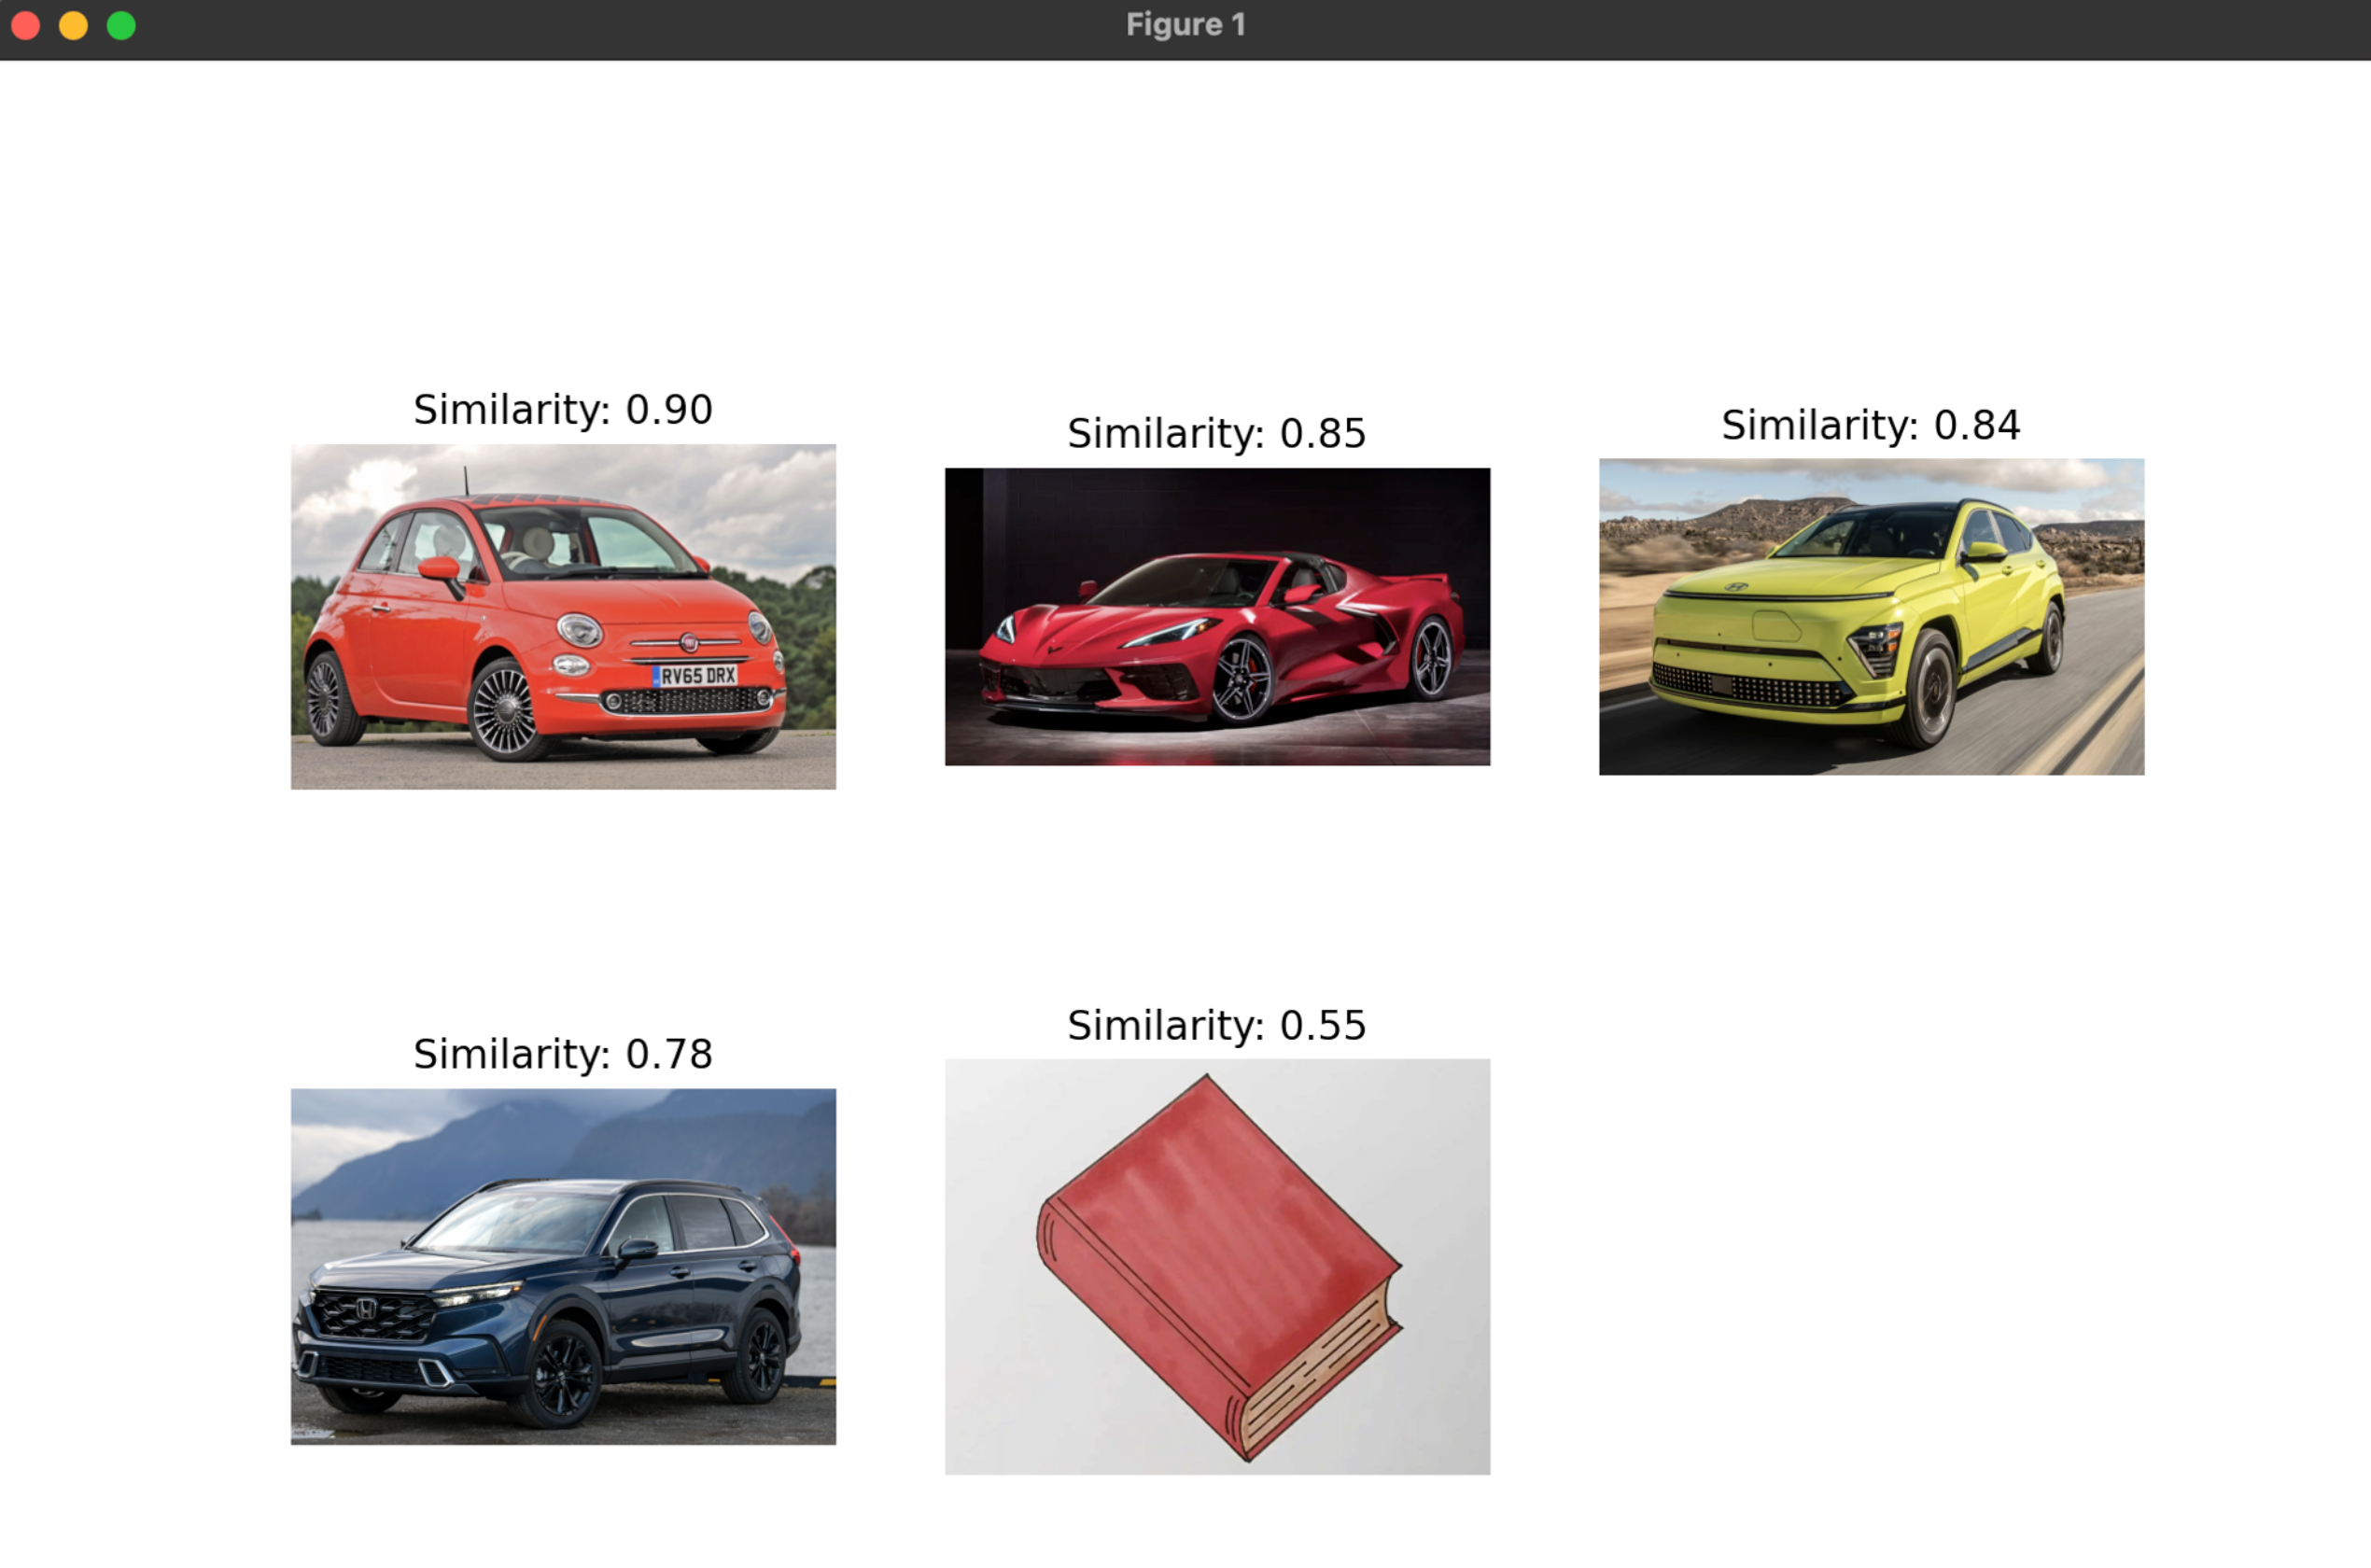
Now that we have the results, we can use matplotlib to visualize them.
The plot_results function does the following:
- Loads a test image from a specified path.
- Finds similar images from the database.
- Sets up a display grid with 3 columns.
- For each similar image with a similarity score above
0.5:- Fetches the image from its URL.
- Adds it to the display grid with a similarity score label.
- Displays the grid of images.
🚨 Note that I have added a test image to an images/ folder in the root of the
repository!
Similar to before, we will add plot_result as a new script to the
pyproject.toml file so that it can be executed with poetry.
toml
toml
Then, if we run poetry run search, it should display the following screen
based on the input images you provided.
Creating a REST API
Now that we have the necessary retrieval logic, we will expose an endpoint that we’ll then integrate with from the frontend. There are a few ways to create REST services in Python, such as Django, Flask, FastAPI. In this guide, I’ll choose FastAPI.
Let’s add it as a dependency:
sh
sh
We’ll also install Pydantic, which is a data validation library for Python.
There are a few things we need to add to the main.py file.
- FastAPI application setup
py
py
- A new data model
py
py
The Image class represents an endpoint return type.
- Endpoint definition:
py
py
It establishes a POST endpoint at /search/.
- Search function
py
py
It handles incoming POST requests. It expects a file as a request input.
You can start the API with:
sh
sh
Frontend integration
And we’re almost there 🎉 The backend part is completed, and now we only need to integrate it.
The provided code snippet demonstrates how to send an image to our backend and retrieve similar images. For a complete app example, please check out the repository.
ts
ts
Here’s a little demo:
Summary
Now that we have the foundation for an image retrieval app, the next step to transform the current app into a less generic one is to use a specific dataset to train the model. As someone who is new to a lot of machine learning concepts, I am personally excited to learn how to train models and I hope to write about it soon!
To learn more about the tools used in the guide, check out the following links: